Tables
Tables are used throughout Campaign Builder to display and manage lists of items such as To-Dos, NPCs, Locations, Lore, and more. They provide a consistent interface for organizing and manipulating content.
Common Table Features
Adding New Items
Most tables have an "Add" button in the header area. Click this button to create a new row in the table. The button typically displays a "+" icon along with a label describing what type of item will be created (e.g., "Add To-Do", "Add NPC").
Some tables also support drag-and-drop from external sources to add new items.
Working with Content
Some special content type has extra behavior:
- Underlined names are links to other content in Campaign Builder or Foundry. For Campaign Builder links, hold Control when you click to open in a new tab or Alt to open in a new panel.
- In editable text boxes, URLs can be clicked to open in a new tab.
- In editable text boxes, UUIDs that you put in the text become links to other content in Campaign Builder or Foundry. For Campaign Builder links, hold Control when you click to open in a new tab or Alt to open in a new panel.
Filtering
Many tables include a search/filter field in the header. Type in this field to filter the table contents to only show rows that match your search term. The filter searches across all visible columns in the table.
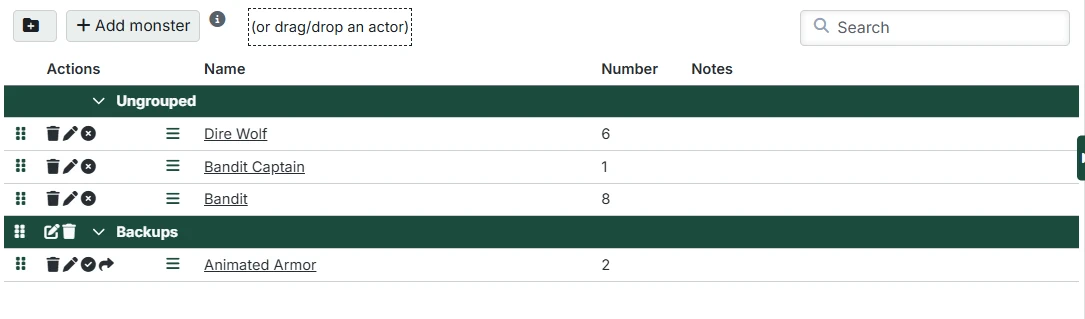
Working with Groups
Many tables support grouping items for better organization. Grouped tables display items organized under collapsible group headers. You can control which tables use a group display in the Module Settings.
Creating Groups
To create a new group:
- Click the folder icon button in the table header
- A new group will be created with a default name
- The group name will be highlighted for immediate editing
- Type the desired name and press Enter to save, or Escape to cancel
Editing Groups
To edit a group name:
- Click on the pencil icon or the group name
- The name will become editable
- Type the new name and press Enter to save, or Escape to cancel
Deleting Groups
To delete a group:
- Click the trash icon in the group header
- Confirm the deletion when prompted
INFO
Deleting a group does not delete the items within it. Items in a deleted group will be moved to the "Ungrouped" section.
Collapsing and Expanding Groups
Click the toggle button (arrow icon) next to a group name to collapse or expand that group. This is useful for focusing on specific groups while hiding others.
Reordering Items
Tables that support reordering display a grip handle (vertical dots or lines) on the left side of each row. To reorder items:
- Click and hold the grip handle on the row you want to move
- Drag the row up or down to the desired position
- Release the mouse button to drop the row in its new position
A visual indicator shows where the row will be placed when you release.
Moving Items Between Groups
You can move items from one group to another using drag and drop:
- Click and hold the grip handle on the row you want to move
- Drag the row over the header of the destination group
- If a group header is closed, you can hover over the header for a moment until the group expands
- Drag the row into the expanded group to the desired position
- Release the mouse button to drop the row
You can also drop the row right onto the header to add it to that group.
Editing and Deleting Rows
Editing Row Content
Many tables allow you to edit cell content directly:
- Click on the cell you want to edit
- The row will switch to edit mode (text field or checkbox depending on the column type)
- Make your changes
- Press Enter to save, or Escape to cancel
You can also use the edit icon (pencil) in the Actions column to enter edit mode.
You can drag content from Foundry into the edit boxes to create a UUID that will become a link when you save the row. Similarly, you can drag any content from a Campaign Builder directory in to create a link to that content.
URLs will be clickable when you save the row.
Deleting Rows
To delete a row:
- Click the trash icon in the Actions column
- Confirm the deletion when prompted