Create Entry
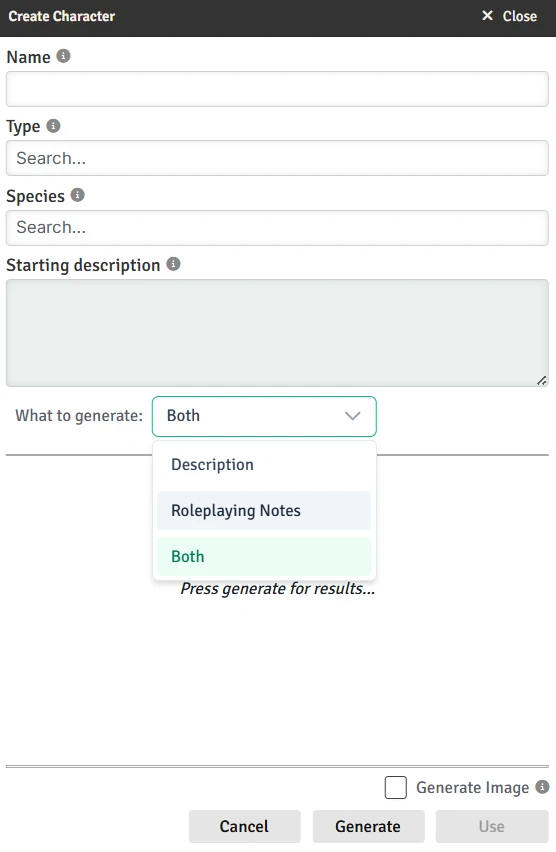
The Create Entry dialog is where you can create a new Entry.
INFO
When creating a PC, you'll simply be prompted for the player name. You can then link the actor to the PC to set name and image.
Fields
There are several fields you can (optionally) fill in:
- Name - The name of the Entry. This is required to complete the Entry, but if you are using 'Generate' [Advanced Feature], you can leave it blank, and it will be generated for you along with the description.
- Type - The Type of Entry. This text box works the same as the Type field on Entries with respect to autocomplete and adding new Types.
- Parent (Location, Organization only) - The parent of the Entry. This is optional. Typing in the box will search for matching Locations/Organizations.
- Species (Character only) - The species of the Entry. This is optional. Typing in the box will search for matching Species.
INFO
You can enter a custom species in the box, or even a description (ex. "A blakhduq, which looks like an overgrown duck with demon horns"). This will then be used for description generation, but the species will not be added to the master list or set on the Entry.
Description - The description of the Entry. This is optional, but highly recommended if you plan to generate an image or description (Advanced Feature). The description can be a very brief description or just a list of characteristics. Any information contained in the description will be included in the generated version (if it fits).
When you first open the dialog, the background of the description is shaded. This indicates that if you hit "Use" to create the Entry, this field's value will become the description of the new Entry. Once you hit "Generate", the shaded background will move to the generated description, indicating that is what will now be used instead.
These will all populate from any existing information on the Entry. Name, species, and description can all be generated by the AI [Advanced Feature] if you leave them blank. Type won't be generated.
Options
There are 2-3 options below the description field:
What to generate
You can generate a long description, roleplaying notes, or both.
If you are using roleplaying notes (see Module Settings), you will have the choice to populate the description, the notes, or both. If you have that field turned off, you will instead have the option to do long vs. short description. Note that a short description is the same text as the roleplaying notes would have been - it's just used in place of the other description. The number of paragraphs generated for long descriptions, can be set in the Module Settings.
For your full description, you can either get a more "narrative" or "story-like" description (in the number of paragraphs you set with the slider in Module Settings) or you can get a "RPG-Style" description by checking that box in [Modules Settings].
Sample roleplaying notes/short description: 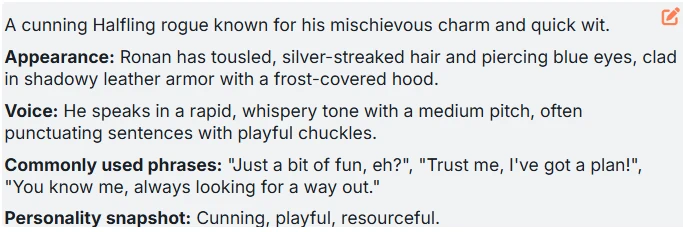
Sample long description (this is a 1-paragraph one): 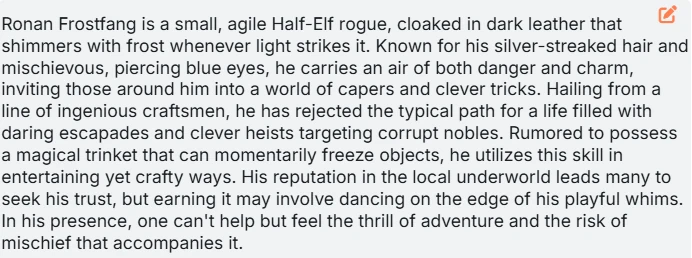
Sample RPG-Style description: 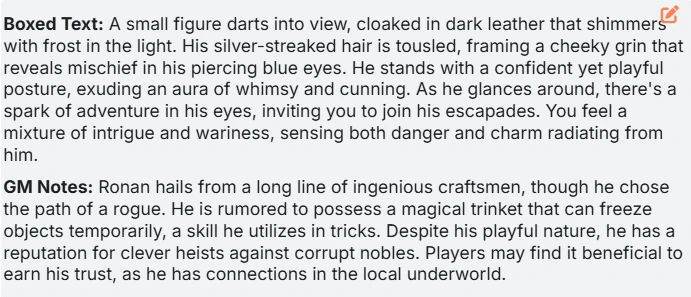
Generate image [Advanced Feature]
When checked, after you finalize and hit "Use", the AI will generate an image for the entry.
Add to current session
This option is only available if you are in Play Mode, and only for Characters or Locations. When checked, this Entry will be added to the Current Session after you hit "Use". Characters are added as NPCs, while Locations are added as Locations. The default value of this checkbox is controlled by the "Default 'Add to current session'" Module Setting.
Generated description [Advanced Feature]
Pressing "Generate" will generate a description (and/or roleplay notes) for the Entry. Any of the fields you left blank will be populated, but the ones you filled will be used as is. Once generation is complete, you can hit "Use" to create the Entry, or hit "Generate" again to try a new description. If you do retry, make sure to clear any fields that you don't want to keep for the next run.